

Hi beauty lovers! I'm back with another beauty tip after a long long time! If you've been with us since the beginning of this blog, you might be able to recall that I've shared a beauty tip on How Long Can I Keep My MakeUp in this particular blog post I mentioned that, you should clean your brushes every 2 - 3 months. And today I'll be sharing 2 ways I use to clean my brushes!
Click on the jump to find out how I clean my make-up brushes!
This is because we need to remove old makeup, dirt & debris, bacteria, oils and dead skill cells accumulated on your makeup brushes. Above all of that, cleaning your brushes keeps it soft. It is ideal to clean your brushes every time you use it, but let's face it, who has time for that? So here's a rough guidelines on how often you should clean your brushes: (Source: http://www.essentialbeautysupplies.com)
- Foundation brushes - Minimum once a week
- Powder, blush and bronzer brushes - once a week
- Eyeshadow brushes - 2-3 days
- Eyeliner brushes - after every use
Now, the first method I use to clean my brushes are Spot Cleaning. I use this method on eyeshadow and eyeliner brushes every time I use one. Tools or things you're going to need for spot cleaning are simply your dirty makeup brushes and a piece of wet wipe. I normally use makeup wipes but baby wipes would do the same trick too!

Step 1: Take out a piece of wet wipes
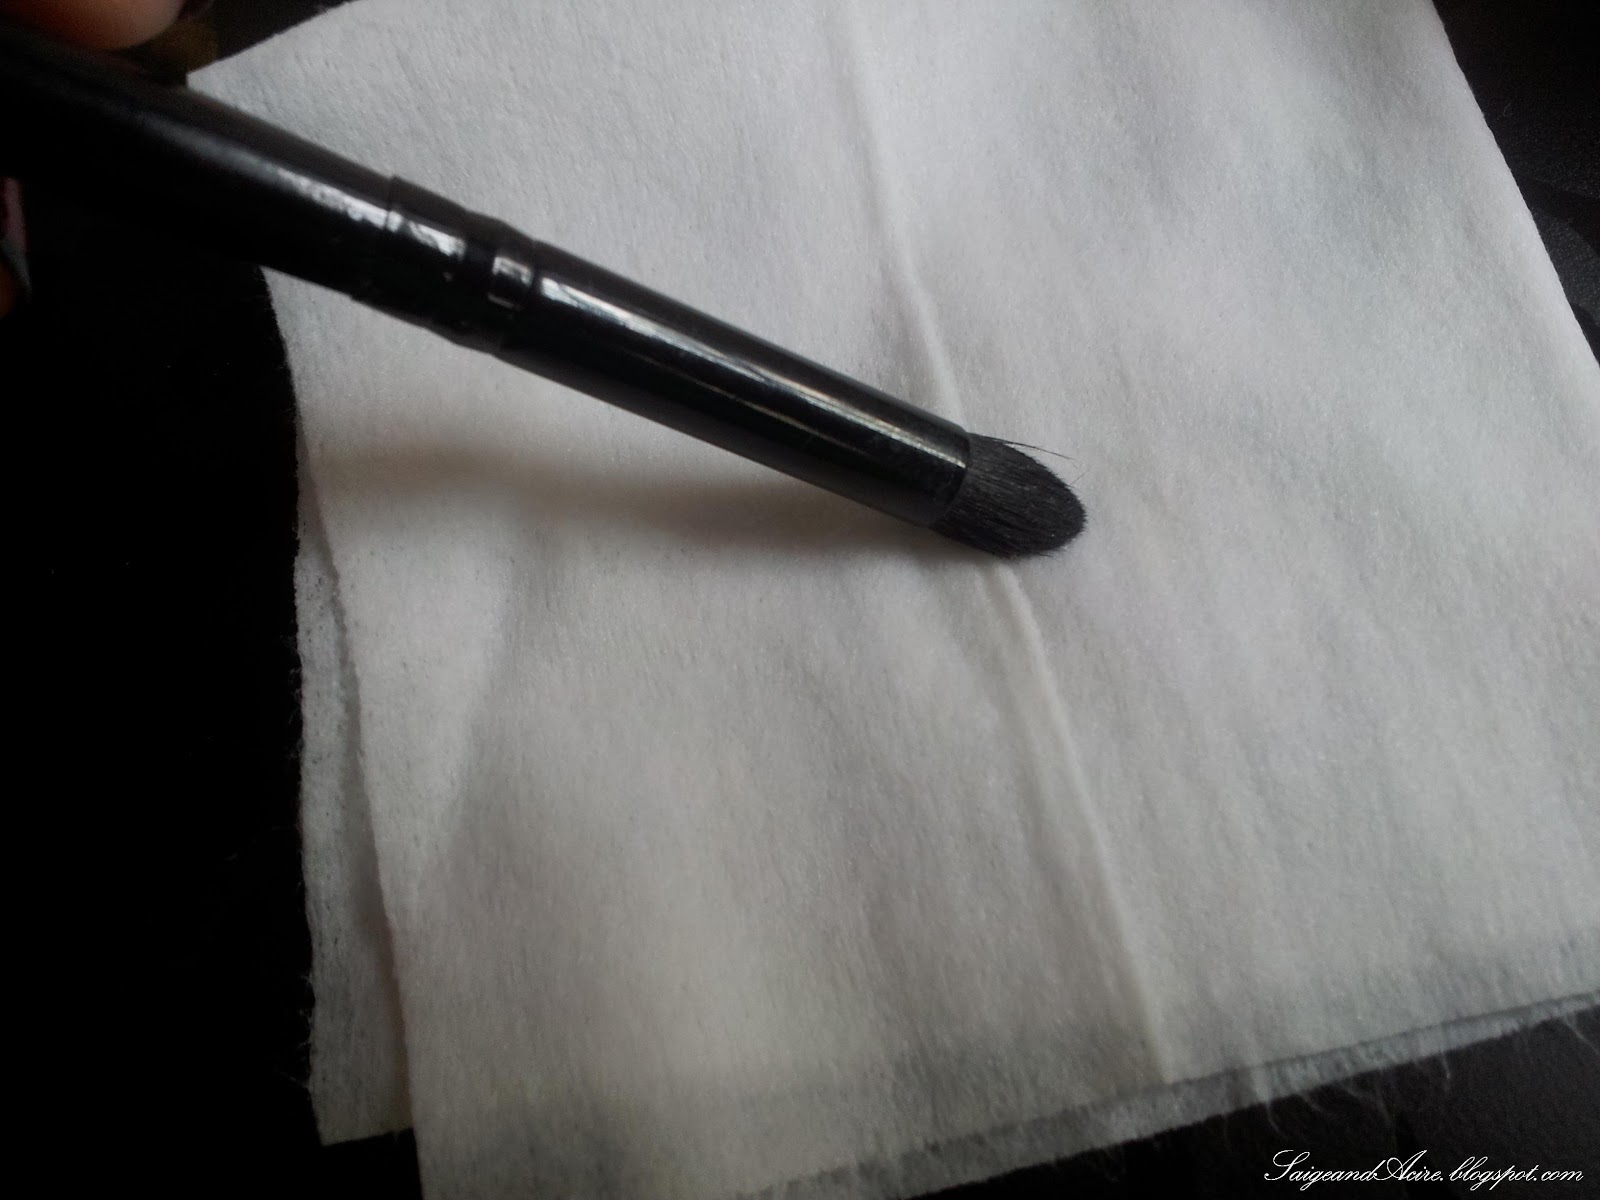
Step 2: Gently brush your brushes in a single direction on the wipes. Repeat until brush is completely clean!

Ta-daa! All your eyeshadow and eyeliner will be removed from your brushes and look at how dirty your wet wipes are right now!
The second method I use is Deep Cleaning. I use this method on all my brushes when they get dirty. The tools required for this method are:
- Dirty Makeup Brushes
- Kitchen Towel
- Mild Soap or Body Wash
- Conditioner or Olive Oil
- Plastic Plate (or any other similar tools to hold your soap)

This is the plastic plate I use. Note: You can keep the plastic plate after washing them for future use again for at least 3 or 4 more times before disposing them away.

Step 1: Pump about 3 to 4 times of your soap onto the plastic plate. (Multiply or lessen the amount of soap used depending on the number of brushes you are cleansing)
Step 2: Pump about 2 to 3 times of your conditioner or if you are using olive oil, pour approximately 1 teaspoon onto your plastic plate.

Step 3: (Picture 1) Using your first brush, mix the mixture completely like in picture 2.
Step 4: (Picture 3) Transfer a small amount of the mixture and start brushing in a single circular motion on your palms. When it gets too soapy or foamy, gently press excess foam out and continue until you feel the brush is clean.
Step 5: (Picture 4) Rinse completely, the soap mixture out of the brush.
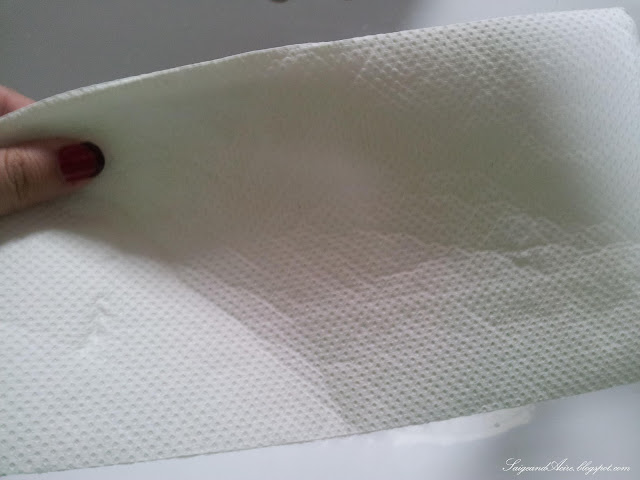
Step 6: (Picture 5) Gently tap your brush on a kitchen towel to make it semi-dry.
Step 7: Repeat Step 4 to 6 on the remaining brushes.
Step 8: Take another piece of kitchen towel and fold it into a rectangular strip. Align your makeup brushes with the handles facing upwards against the wall on the kitchen towel and let it air dry completely. (As shown in the picture below)

You may also place your makeup brush guard to shape your brush while it air-dries to reshape your brushes and prevent splaying. Note: Do not leave your brush to dry facing upwards as the water can run down the ferrule and loosen the glue holding onto the brush together over time.
That's all I've got to share for today's post. Remember to wash your brushes frequently to prevent break outs! If you would like to see more beauty tips, do leave me a comment below or tweet to us @SaigeandAcire if you haven't already done so, check out my beauty tip on how long can I keep my makeup blog post here.
Disclaimer: All tips and opinions are based on personal experiences and belongs to me!
Xoxo,
Acire ♥
No comments:
Post a Comment